Published on 11/09/2022 14:25 by Conner Replogle

Introduction
This guide will show you how to set up the development environment for the T-Display-S3. While this guide is targeted at this specific development board, any other development board should work for this or any other screen with minor differences in instructions. Before we get into the guide I am going to explain the 2 components of this project.
T-Display-S3
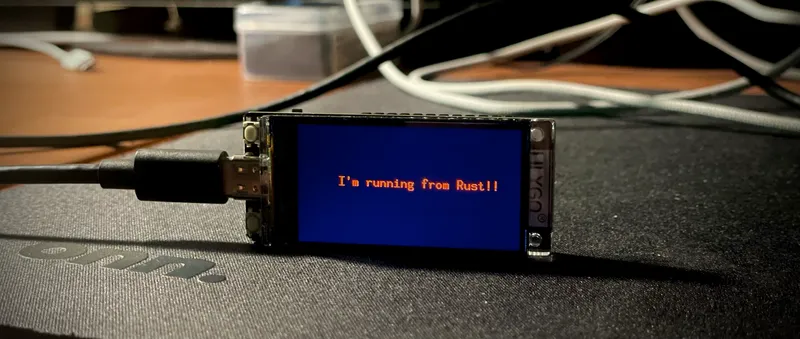
The T-Display-S3 is a great development board offered by LilyGo, for a price of ~$25 you get an ESP32-S3R8 with a 1.9in 8bit LCD screen. This combo makes experimenting with the ESP32 a lot more interesting because you can output to a screen instead of through a serial output. While LilyGo included a very helpful GitHub for examples using the T-Display-S3 with Arduino and Platform-IO, it lacks any guide for using this board with Rust. The T-Display-S3 comes in multiple versions in this guide. We will be using the soldered version of non-touch.

Rust
Why use Rust? well, there are many reasons to use Rust in embedded systems. I love writing Rust and find the developer experience unmatched, but many out there have differing opinions. A more technical reason is the memory safety Rust provides. While you can still shoot yourself in the foot, Rust makes it quite hard to do so as opposed to C.
Rust’s compiler enforces a strict borrow checker to ensure your code is memory-safe. This can be a downside since some actions you want to perform the Rust borrow checker will fight you on, even if you know it is safe. They do mediate this by having unsafe keywords to help but it still presents more difficulty than C.
Lastly, another downside of Rust is the lack of embedded libraries and debugging support. I want to stress that this is changing every day and hundreds of dedicated developers are working hard to make Rust a 1st class language for embedded systems.
Getting Started
A good first start when you get the T-Display-S3 is to head over to LilyGo’s Github and follow their instructions to get the board up and going before we migrate to Rust.
Once you verify your board works by running one of the examples we can now start setting up the Rust environment.
- To start, make sure you have Rust installed. It is very easy and can be done with an oneliner from rustup
- Run these cargo commands in the terminal.
  cargo install cargo-generate
  cargo install ldproxy
  cargo install espup
  cargo install espflash
  cargo install cargo-espflash # Optional

  # macOS
  brew install libuv
  # Debian/Ubuntu/etc.
  apt-get install libuv-dev
  # Fedora
  dnf install systemd-devel
- Now we will use espup to set up the build environment for the ESP32.
espup install
- Every time you are compiling for the ESP32 you will need to use this command to properly set up the toolchain (later, I will show how to avoid this)
# Unix
. $HOME/export-esp.sh
# Windows
%USERPROFILE%\export-esp.ps1
- Now let’s use cargo-generate to set up an environment we are making a esp-idf project which builds with a Rust std as opposed to a bare metal project that comes with no std library.
cargo generate esp-rs/esp-idf-template cargo
- When cargo generate runs it will ask you the following questions.
Project Name:Crate NameWhich MCU to target?this is your MCU model something like esp32c2, esp32s2 … for this guide we are using esp32s3Configure advanced template options?for this guide we are selecting false you can refer to the esp-idf-template GitHub linked above to see the options.
- After this everything is set up and you should be able to build and compile by running
cargo run. However, there are some quality-of-life additions that I do to make the built environment a little easier to work with and to get more control over the ESP32.
Optional Setup
The following two little additions are things I have done personally, to make the development experience a little cleaner and to add additional features.
Avoid Sourcing file
To avoid having to source the file we can make cargo source it before it compiles the project.
If you are in the root of your project you can navigate to: .cargo/config.toml and under the [env] tag add the contents of your source file from step 4
so it looks like the following
## .cargo/config.toml
## Rest of file above ^^

[unstable]
build-std = ["std", "panic_abort"]

[env]
# Note: these variables are not used when
#using pio builder (`cargo build --features pio`)
ESP_IDF_VERSION = "v5.1.1"

#new stuff is below
LIBCLANG_PATH="/Users/connerreplogle/.rustup
/toolchains/esp/...very long"
PATH="/Users/connerreplogle/.rustup/toolchains/
esp/...very long"
#$HOME/export-esp.sh
export PATH="/Users/connerreplogle/.rustup/
toolchains/esp/xtensa-esp32-elf/
esp-12.2.0_20230208/xtensa-esp32-elf/
bin:$PATH"
export PATH="/Users/connerreplogle/.rustup/
toolchains/esp/xtensa-esp32s2-elf/
esp-12.2.0_20230208/xtensa-esp32s2-elf/
bin:$PATH"
export PATH="/Users/connerreplogle/.rustup/
toolchains/esp/xtensa-esp32s3-elf/
esp-12.2.0_20230208/xtensa-esp32s3-elf/
bin:$PATH"
export PATH="/Users/connerreplogle/.rustup/
toolchains/esp/riscv32-esp-elf/
esp-12.2.0_20230208/riscv32-esp-elf/
bin:$PATH"
export LIBCLANG_PATH="/Users/connerreplogle/
.rustup/toolchains/esp/
xtensa-esp32-elf-clang/
esp-16.0.0-20230516/
esp-clang/lib"
Setting up cargo-pio to use menuconfig
embuild is a library the esp-idf uses during the build process but it has another component that is not mentioned often that will allow us to use menuconfig. Menuconfig is a program we can use to set up the configuration file for the esp32 in a nice tui (terminal UI), it gives us tons of options that we can modify.
To set this up it is very simple just run:
cargo install cargo-pio.
Then to run menuconfig: cargo pio espidf menuconfig
Conclusion
Now your environment should be all set to run Rust code on your ESP43, in the next part we will explore the options for rendering to the builtin screen and also the basics of using the esp-idf-hall to toggle gpio pins and other embedded features.
Written by Conner Replogle
← Back to blog